Add smoke to anything in Photoshop
Step 1: Installing Smoke Brushes
In this tutorials you will learn how to add smoke to anything and also change the color of the smoke

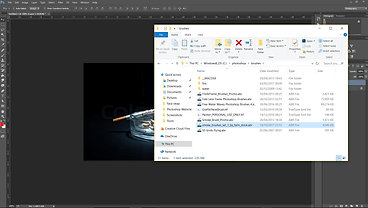
First you need to install a smoke brush pack. You can find different smoke brushes online but to download the one i'm using click here. Once you have downloaded the file just drag it into Photoshop like you would drag a picture and the brushes should automatically be installed and available to use
Step 2: Using the brush window
While you have your "Brush Tool" selected right click in your composition and the brush window will pop up. Here you can select one of the smoke brushes we have just installed. You can also resize your brush by changing the "px" at the top and also change direction of your brush by clicking and holding the triangle next to the circle and rotating moving it.


Step 3: Applying the smoke
To apply the smoke just click on where you want your smoke to go. You can also decrease the opacity of the brush to make it blend better with your image. Make sure you create a new layer for every smoke you create. This will allow you to freely delete and manipulate the smoke
Since we are using the "Brush Tool" you can change the color of your brush to also change color of your smoke. This allows you to create different effects

Step 4: Changing color of the smoke
More Tutorials
In this tutorial you will learn how to easily remove the background from your subject even when the hair is tricky
In this tutorial you will learn how to easily swap faces between 2 completely different people. This is the easiest and fastest way to face swap


